Homemade Peanut Butter Cups with Honey
Highlighted under: Oven-Made Sweets
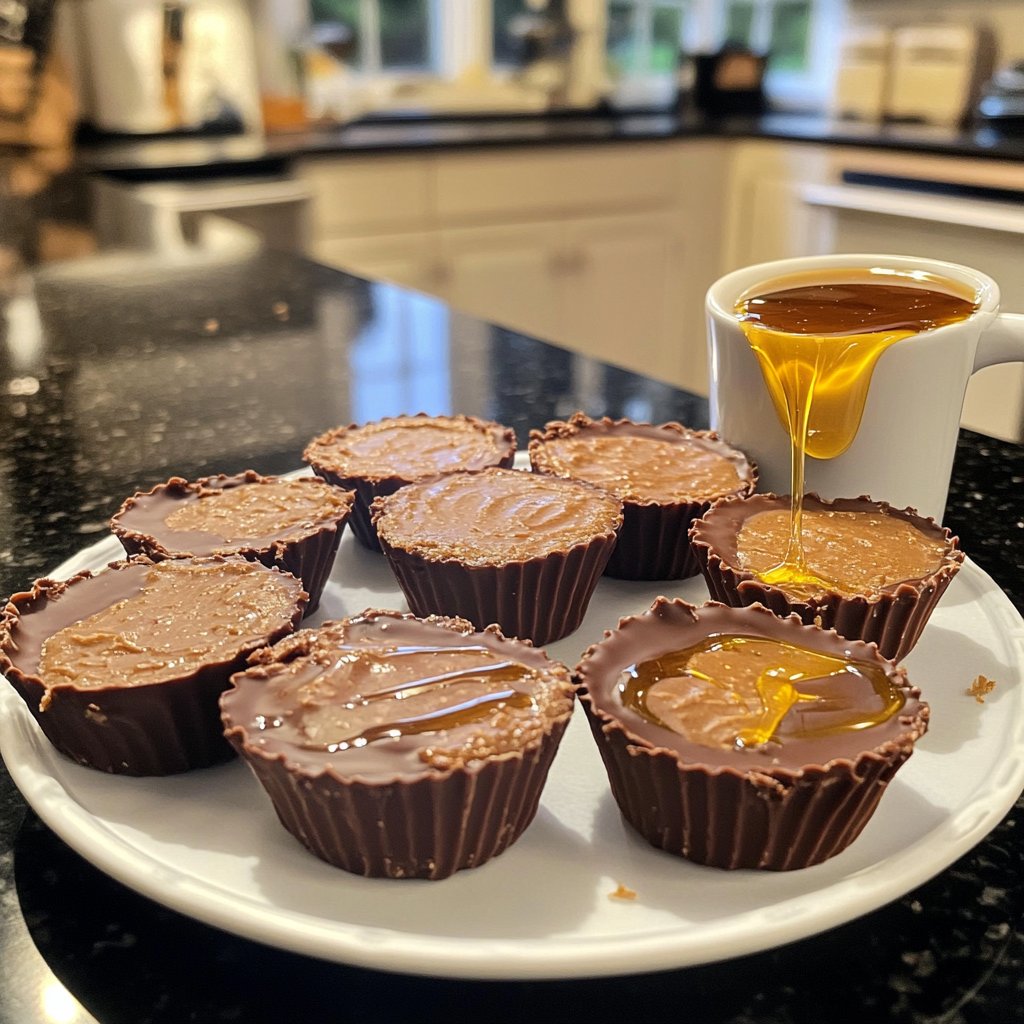
I can't begin to tell you how much I adore making these Homemade Peanut Butter Cups with Honey! The process is not only simple but also incredibly satisfying. When we mix the creamy peanut butter with a touch of honey, it creates a delectable filling that balances sweetness and salty richness beautifully. The chocolate shell melts in your mouth, making these treats irresistible. It's a fun and rewarding activity, especially when shared with friends or family. Trust me, once you try making them at home, you'll never go back to store-bought!
Every time I whip up a batch of these peanut butter cups, I am reminded of my childhood. The joy of unwrapping a chocolate-covered treat and savoring the perfect creamy peanut butter inside is something I wanted to recreate. I tried different recipes, but nothing beats using honey in the filling; it adds a delightful sweetness that elevates these cups to another level.
One of my favorite tips is to let the chocolate shell harden completely before adding the peanut butter mixture. This ensures that each bite has the perfect amount of crunch before reaching the creamy center. By being patient in this step, you’ll create a lovely contrast that makes these treats even more enjoyable!
Why You'll Love These Cups
- Deliciously rich peanut butter filling sweetened with honey
- Chocolate coating that adds a perfect crisp texture
- Easy to make and customize with your favorite toppings
Mastering the Chocolate Coating
Achieving the perfect chocolate coating for your peanut butter cups is essential. When melting the dark chocolate chips, it's important to do so slowly in the microwave. Use a microwave-safe bowl and heat it in 30-second intervals, stirring well after each interval. This method prevents the chocolate from seizing, ensuring you get a smooth and glossy finish that forms a nice contrast to the creamy filling.
If you find that your chocolate is too thick after melting, you can adjust its consistency by adding a little more coconut oil. This will not only improve the flow of the chocolate but also give your cups a nice sheen once set. Make sure the chocolate isn't overheated, as burnt chocolate can ruin both texture and taste.
Filling Variations
While the honey-peanut butter filling is delicious on its own, consider experimenting with additional flavors to elevate your cups. For a hint of saltiness, add a pinch of sea salt to the filling; this brings out the natural flavors beautifully. You might also try incorporating other nut butters like almond or cashew for a unique twist.
If you're looking for a protein boost, mix in some protein powder or crushed nuts into the peanut butter filling. This not only enhances the texture but also makes for a more substantial treat. Just be sure to adjust the sweetness accordingly if you add more ingredients!
Ingredients
Gather these simple ingredients to create your own delightful treats:
For the Peanut Butter Filling:
- 1 cup creamy peanut butter
- 1/4 cup honey
- 1/2 cup powdered sugar
- 1/2 teaspoon vanilla extract
For the Chocolate Coating:
- 1 1/2 cups dark chocolate chips
- 1 tablespoon coconut oil
Now that you have everything you need, let’s start making these delicious cups!
Instructions
Follow these steps for a perfect batch of Homemade Peanut Butter Cups:
Prepare the Muffin Tin
Line a muffin tin with paper liners to make it easier to remove the cups later.
Melt the Chocolate
In a microwave-safe bowl, combine dark chocolate chips and coconut oil. Microwave in 30-second intervals, stirring in between, until completely melted and smooth.
Create the Chocolate Shell
Spoon a small amount of melted chocolate into the bottom of each muffin liner, just enough to cover the bottom. Place in the freezer for 10 minutes to harden.
Mix the Filling
In a medium bowl, mix together the peanut butter, honey, powdered sugar, and vanilla extract until well combined.
Add Peanut Butter Filling
Once the chocolate has hardened, add a spoonful of the peanut butter mixture on top of the hardened chocolate in each cup.
Finish with Chocolate
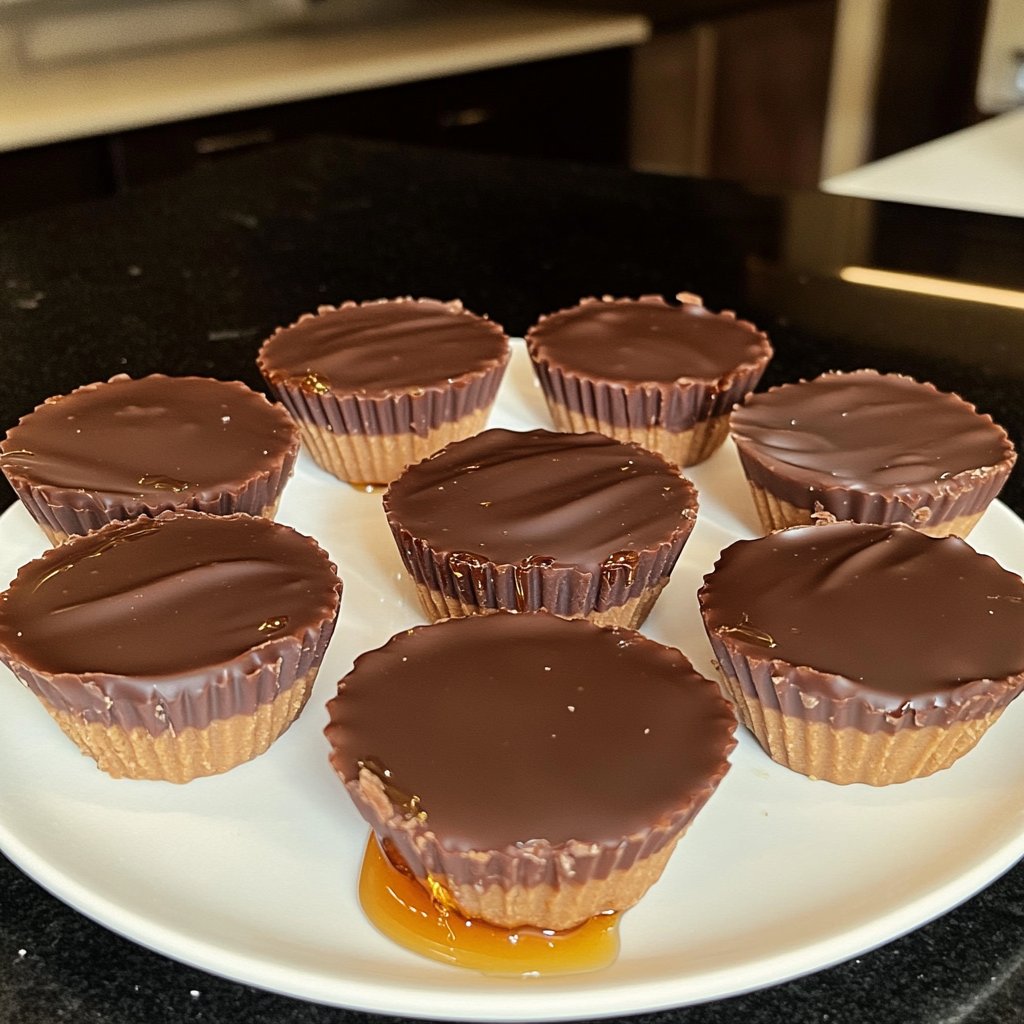
Top the peanut butter filling with more melted chocolate until it is completely covered. Make sure the filling is sealed well.
Cool and Serve
Refrigerate the cups for at least 10 minutes until set. Enjoy your homemade treats!
Once these cups are fully set, they’ll be ready to indulge in!
Pro Tips
- Feel free to customize the peanut butter filling by adding crushed nuts or a sprinkle of sea salt before sealing with chocolate for an extra crunch. These cups can also be kept in the refrigerator for a week, but I doubt they’ll last that long!
Storage Tips
To keep your homemade peanut butter cups fresh, store them in an airtight container in the refrigerator. They can last up to two weeks if properly stored, maintaining their flavor and texture. If you're looking to enjoy them later, freezing is a great option—just ensure each cup is individually wrapped to prevent sticking.
When ready to eat frozen cups, simply transfer them to the fridge for a few hours to thaw, or enjoy them directly from the freezer for a colder treat. This versatility allows you to indulge in your homemade goodies at your leisure!
Scaling Up the Recipe
If you're planning to make a larger batch for a party or event, it’s easy to scale this recipe. Simply double or triple the ingredient amounts while keeping the same ratios. Make sure you have enough muffin liners and a larger muffin tin or additional tins ready to accommodate the increased mixture.
For even more efficiency, you can prepare the filling and chocolate shell separately, allowing for quicker assembly as you layer them in the muffin cups. Just ensure that the melted chocolate remains warm enough to work with; if it cools too much, it might not spread easily over the peanut butter filling.
Questions About Recipes
→ Can I use natural peanut butter?
Yes, but keep in mind that natural peanut butter tends to be a bit runnier, so you may need to adjust the powdered sugar.
→ How do I store leftover cups?
Store them in an airtight container in the refrigerator for up to one week.
→ Can I use milk chocolate instead of dark chocolate?
Absolutely! Milk chocolate will provide a sweeter flavor profile.
→ Can these cups be made vegan?
Yes, substitute the honey with maple syrup and use dairy-free chocolate chips.
Homemade Peanut Butter Cups with Honey
Created by: Ruby Lawson
Recipe Type: Oven-Made Sweets
Skill Level: Intermediate
Final Quantity: 12 cups
What You'll Need
For the Peanut Butter Filling:
- 1 cup creamy peanut butter
- 1/4 cup honey
- 1/2 cup powdered sugar
- 1/2 teaspoon vanilla extract
For the Chocolate Coating:
- 1 1/2 cups dark chocolate chips
- 1 tablespoon coconut oil
How-To Steps
Line a muffin tin with paper liners to make it easier to remove the cups later.
In a microwave-safe bowl, combine dark chocolate chips and coconut oil. Microwave in 30-second intervals, stirring in between, until completely melted and smooth.
Spoon a small amount of melted chocolate into the bottom of each muffin liner, just enough to cover the bottom. Place in the freezer for 10 minutes to harden.
In a medium bowl, mix together the peanut butter, honey, powdered sugar, and vanilla extract until well combined.
Once the chocolate has hardened, add a spoonful of the peanut butter mixture on top of the hardened chocolate in each cup.
Top the peanut butter filling with more melted chocolate until it is completely covered. Make sure the filling is sealed well.
Refrigerate the cups for at least 10 minutes until set. Enjoy your homemade treats!
Extra Tips
- Feel free to customize the peanut butter filling by adding crushed nuts or a sprinkle of sea salt before sealing with chocolate for an extra crunch. These cups can also be kept in the refrigerator for a week, but I doubt they’ll last that long!
Nutritional Breakdown (Per Serving)
- Calories: 200 kcal
- Total Fat: 16g
- Saturated Fat: 5g
- Cholesterol: 0mg
- Sodium: 50mg
- Total Carbohydrates: 15g
- Dietary Fiber: 1g
- Sugars: 11g
- Protein: 4g