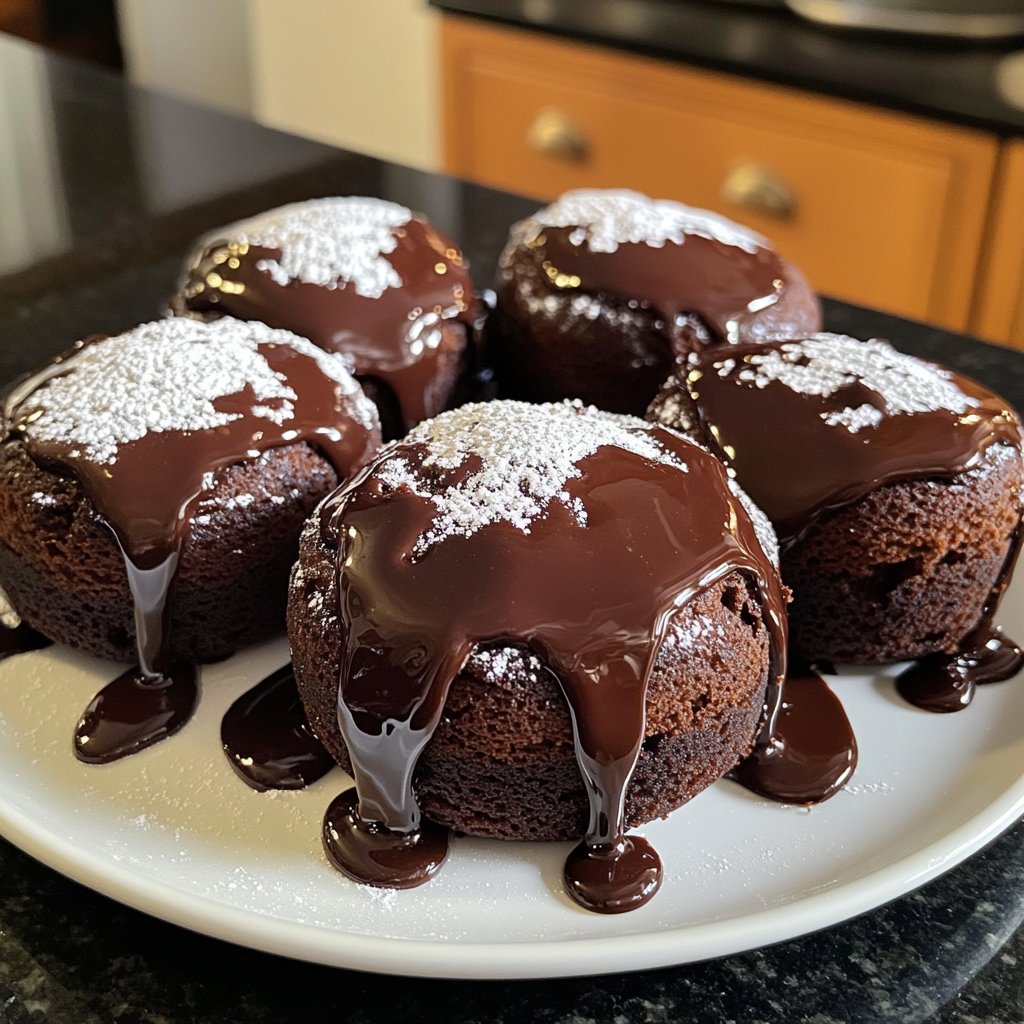
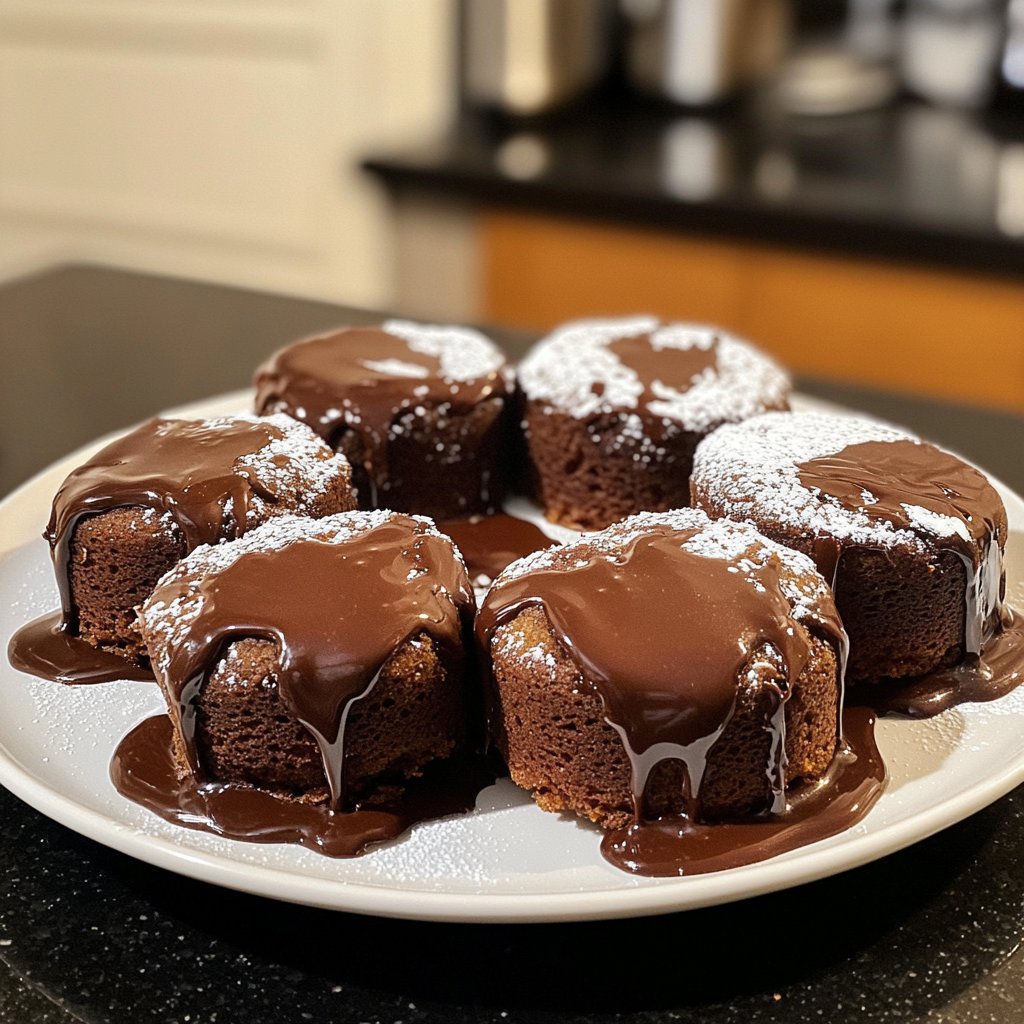
Dark Chocolate Lava Cakes
Highlighted under: Oven-Made Sweets
I absolutely adore baking Dark Chocolate Lava Cakes, a delightful treat that never fails to impress. The combination of rich, melted chocolate and the contrast of a soft, delicate cake is simply divine. I love how the warm, gooey center flows out when you take your first bite, creating an indulgent dessert that's perfect for special occasions or a cozy night in. Each time I make these cakes, I am reminded of their luxurious flavor and how easy they are to prepare, making them a go-to recipe in my baking repertoire.
When I first attempted to make Dark Chocolate Lava Cakes, I was amazed by how something so decadent can come together in less than 30 minutes. Each time I bake them, I'm reminded of the importance of timing; allowing the cakes to rest for just a few minutes after baking ensures that gooey center is perfectly melty versus overcooked. Using high-quality dark chocolate makes a noticeable difference, and I always opt for at least 70% cocoa for that rich flavor.
One tip that I discovered is to prepare the ramekins with a light coating of butter and dust them with cocoa powder instead of flour. This not only helps prevent sticking but adds an extra layer of chocolate flavor to the exterior of the cakes. These small details transform a simple dessert into something truly extraordinary that I love sharing with friends and family.
Why You'll Love These Lava Cakes
- Intense dark chocolate flavor that satisfies your cravings
- Warm, flowing center that surprises and delights with every bite
- Perfectly portioned for an elegant dessert experience
The Importance of Quality Chocolate
When it comes to making Dark Chocolate Lava Cakes, the quality of your chocolate is crucial. I recommend using a dark chocolate bar with at least 70% cocoa content. This ensures that your cakes not only have a rich flavor but also a luxurious mouthfeel. Lower quality chocolate may result in a cake that lacks depth and may even taste overly sweet, overshadowing the desired bittersweet notes. So, always invest in high-quality chocolate for this recipe.
Additionally, your chocolate should be fresh. Expired or stale chocolate may affect not only the flavor but also the texture of your lava cakes. Look for bars that have a smooth finish and a glossy sheen. Before using, chop the chocolate into small pieces to ensure it melts evenly with the butter without any graininess.
Mastering the Baking Technique
Pay close attention to the baking time! The secret to achieving that perfect molten center lies in the timing; you want the edges to set while the center remains soft. A typical baking time of 12 minutes works well, but depending on your oven's heat distribution, you may need to adjust this slightly. Keep a close eye on the cakes as they bake and look for the edges to be firm, while the centers should still jiggle when you gently shake the ramekins.
Another key aspect is letting the cakes rest briefly after baking. Allowing them to cool for just 1 to 2 minutes helps to stabilize the exterior while the interior remains warm and gooey. This careful timing will give you that indulgent flowing center that everyone dreams of when they bite into a lava cake.
Serving and Storing Your Lava Cakes
These lava cakes are best served immediately after baking while they are warm and ooze out that rich chocolate center. Consider pairing them with a scoop of vanilla ice cream or a dollop of whipped cream to balance the intensity of the chocolate. A sprinkle of sea salt can also elevate the flavor profile beautifully, enhancing the sweetness and richness of the dish.
If you want to prepare these lava cakes ahead of time, you can assemble the batter in the ramekins and refrigerate them for up to 24 hours before baking. Just remember that you may need to add an extra minute or two to the baking time if they're coming straight from the fridge. Alternatively, fully cooled lava cakes can be frozen for up to 2 months; simply thaw them in the refrigerator and heat in the oven for a quick treat.
Ingredients
Gather the following ingredients to create your delicious Dark Chocolate Lava Cakes:
Ingredients
- 1/2 cup (115g) unsalted butter
- 1 cup (170g) dark chocolate (70% cocoa), chopped
- 2 large eggs
- 2 large egg yolks
- 1/4 cup (50g) granulated sugar
- 2 tablespoons all-purpose flour
- 1/4 teaspoon salt
- Cocoa powder (for dusting the ramekins)
- Whipped cream or ice cream (for serving, optional)
Instructions
Follow these steps to create your Dark Chocolate Lava Cakes:
Prepare the ramekins
Preheat your oven to 425°F (220°C). Grease four ramekins with butter and dust the insides with cocoa powder. This will help prevent the cakes from sticking.
Melt the chocolate and butter
In a microwave-safe bowl, combine the chopped dark chocolate and unsalted butter. Heat in the microwave in 30-second intervals, stirring until smooth and fully melted.
Mix the egg mixture
In a separate bowl, whisk together the eggs, egg yolks, and granulated sugar until pale and slightly thickened.
Combine ingredients
Pour the melted chocolate mixture into the egg mixture and gently fold until just combined. Add the flour and salt, mixing until smooth.
Fill the ramekins
Distribute the batter evenly among the prepared ramekins, filling each about 3/4 full.
Bake
Bake in the preheated oven for 12 minutes, or until the edges are firm but the center is still soft. Let them cool for 1-2 minutes before serving.
Enjoy your decadent lava cakes warm, with a scoop of ice cream or a dollop of whipped cream if desired!
Pro Tips
- For an extra touch, add a pinch of espresso powder to enhance the chocolate flavor. You can also experiment by adding a teaspoon of orange liqueur or vanilla extract for a different flavor profile.
Troubleshooting Common Issues
If your lava cakes do not have a molten center, it might be that they were baked too long. Remember, they should be firm to the touch around the edges but still soft in the middle. If they turn out too solid, next time reduce your baking time by a minute or two.
Another issue could arise if the cakes stick to the ramekins. This is why greasing them thoroughly with butter and dusting with cocoa powder is so important. You might also consider using parchment paper circles at the bottom of the ramekins for an added layer of protection against sticking.
Ingredient Substitutions
For those looking for a dairy-free version of these lava cakes, you can replace the unsalted butter with a vegan alternative like coconut oil or a plant-based butter substitute. Additionally, ensure that the chocolate you choose is dairy-free, as some dark chocolates may still contain traces of milk.
If you're aiming for a less rich option, you can swap out half of the chocolate for an equal amount of applesauce or Greek yogurt, which will reduce the fat content while still providing a moist texture. Just keep in mind that this may alter the signature lava experience slightly.
Variations to Try
Feel free to get creative with flavor variations! Adding a teaspoon of espresso powder to the chocolate mixture can enhance the chocolate flavor without making the cakes taste like coffee. For an exciting twist, consider incorporating orange zest or a splash of orange liqueur into the batter for a citrusy flair.
Another delightful variation involves mixing in a handful of chopped nuts, such as hazelnuts or almonds, to the batter for added texture. You can even experiment with a small piece of your favorite candy or caramel tucked into the center for an unexpected surprise!
Questions About Recipes
→ Can I make these lava cakes in advance?
Yes, you can prepare the batter ahead of time and store it in the fridge for up to 24 hours. Just remember to bring it back to room temperature before baking.
→ What can I use if I don't have ramekins?
You can use muffin tins or oven-safe mugs, but make sure to adjust the baking time accordingly since they may cook faster.
→ How do I know when the lava cakes are done?
The edges should be set while the center remains soft. A toothpick inserted should come out with moist crumbs, not clean.
→ Can these be frozen?
Yes, you can freeze baked lava cakes. Wrap them tightly in plastic wrap and store them in an airtight container for up to 2 months. Reheat in the oven before serving.
Dark Chocolate Lava Cakes
Created by: Ruby Lawson
Recipe Type: Oven-Made Sweets
Skill Level: Intermediate
Final Quantity: 4 servings
What You'll Need
Ingredients
- 1/2 cup (115g) unsalted butter
- 1 cup (170g) dark chocolate (70% cocoa), chopped
- 2 large eggs
- 2 large egg yolks
- 1/4 cup (50g) granulated sugar
- 2 tablespoons all-purpose flour
- 1/4 teaspoon salt
- Cocoa powder (for dusting the ramekins)
- Whipped cream or ice cream (for serving, optional)
How-To Steps
Preheat your oven to 425°F (220°C). Grease four ramekins with butter and dust the insides with cocoa powder. This will help prevent the cakes from sticking.
In a microwave-safe bowl, combine the chopped dark chocolate and unsalted butter. Heat in the microwave in 30-second intervals, stirring until smooth and fully melted.
In a separate bowl, whisk together the eggs, egg yolks, and granulated sugar until pale and slightly thickened.
Pour the melted chocolate mixture into the egg mixture and gently fold until just combined. Add the flour and salt, mixing until smooth.
Distribute the batter evenly among the prepared ramekins, filling each about 3/4 full.
Bake in the preheated oven for 12 minutes, or until the edges are firm but the center is still soft. Let them cool for 1-2 minutes before serving.
Extra Tips
- For an extra touch, add a pinch of espresso powder to enhance the chocolate flavor. You can also experiment by adding a teaspoon of orange liqueur or vanilla extract for a different flavor profile.
Nutritional Breakdown (Per Serving)
- Calories: 380 kcal
- Total Fat: 26g
- Saturated Fat: 15g
- Cholesterol: 195mg
- Sodium: 85mg
- Total Carbohydrates: 32g
- Dietary Fiber: 3g
- Sugars: 24g
- Protein: 6g